Search This Blog

Saturday 27 April 2019

One Layer Card

I’ve not done any colouring for a little while and today a challenge came through from ‘Less is More!’ that sparked my interest. I hope you like it.


This minimal type of card takes a lot more effort than the end results would let you believe. It was coloured with alcohol markers.


Finding a suitable stamp meant I needed to play around with the image. I have used a freebie from a magazine that I’ve had for a few years now. It was a corner stamp and a bit too large, so out came the washi tape. I covered the area I did not want to use before inking. Speaking from experience, don’t forget to remove the washi tape before you stamp your image. I have used a stamp positioner, which helps you get just the result you want.


Thursday 18 April 2019

A Music Card

Sometimes it’s a bit hard to come up with cards that are suitable for the men in your life! This card was inspired by the Kaisercraft ‘Always & Forever’ paper pack. Having a musical paper that was coloured just seemed to work. I have used the Memory Box Musical Treble Clef die, along with stamps from a very old Inkadinkado set.


This is a 6 x 4 card, using a separate matching top layer. Working on the topper, I have cut a piece of Kaisercraft paper, firstly as 4 x 4 and then cutting it at an angle. Measuring 1 3/4” down one side of the music paper, and lining up with the opposite corner, cut the paper at an angle. Stick musical paper to your topper piece of card.


Using a Scoreboard, score immediately above the music paper line. Selecting your sentiments, stamp just above this score line. Score a second line above your sentiments.


Turn the paper over and the two existing score marks are now visible. Realign each score line and score again over the existing score lines. This reverses the score mark, making mountain score lines. 

I have used washi tape to make sure the paper in stays in place. Carefully continue to score across the remaining card towards the top, until the top section is all with mountain style score lines.


To finish the card, I have die cut two treble clefs and stuck them together, before sticking to the front of the card. The topper has then be attached with dimensionals for effect.

Saturday 13 April 2019

Nursery Shadow Box

I have been researching shadow boxes for a little while now. I think of this as the new style of craft, so instead of the needlework samplers, which I do so admire, we can have paper crafted ones instead!
I have used Stampin’ Up stamp & die sets, Sweet Storybook; Fable Friends & Animal Outing.
Well Written Framelit dies were used for the foliage, flowers bird & butterflies.


This sampler uses a deep shadow box measuring 9” x 9” I have added dimensions lastly for reference. The images have been hand coloured with Alchol markers and layered for effect. The plain card all uses the matching colours to Stampin’ Up Twinkle Twinkle dsp, which is the spotted back ground paper.
A space has been left at the top and is for my Grandaughters name & date of birth.


All measurements in inches.
Background 9 x 9
Two base rectangles 2 7/8 x 5 5/8
Two top rectangles 2 5/8 x 5 3/8
Two base squares 2 7/8 x 2 7/8
Two top squares 2 5/8 x 2 5/8 (using Stampin’ Up Stitched Shape Framelits largest die)


Tuesday 9 April 2019

Special Card

I was asked for a card for a 21st birthday, with the unusual colour of black! Luckily I had some black pearl card that went really well with Stampin’ Up Foil sheets in Lovely Lipstick.

This card is using a centre opening base, that has been die cut on the front making two front flaps. By using a larger detail die, the Foil sheet inside is visible through the gaps


The Foil sheet is added inside the black  card and is base opening, cut just fractionally smaller than the main black card base. The circular layer to the front, is stuck on only one side of the card, and doubles as holding the ribbon in place. 


After completing the card I decided to add 21 to the circular layer in black pearl card.

Wednesday 3 April 2019

Colour Challenge

A first for me is a colour challenge, with my favourite colours, how could I resist. 
The challenge is from ‘AUSSIES WHO LOVE STAMPIN’ UP’ so all the cardstock & supplies today are from Stampin’ Up.
I have layered Bermuda Bay cardstock onto a Coastal Cabana card base.
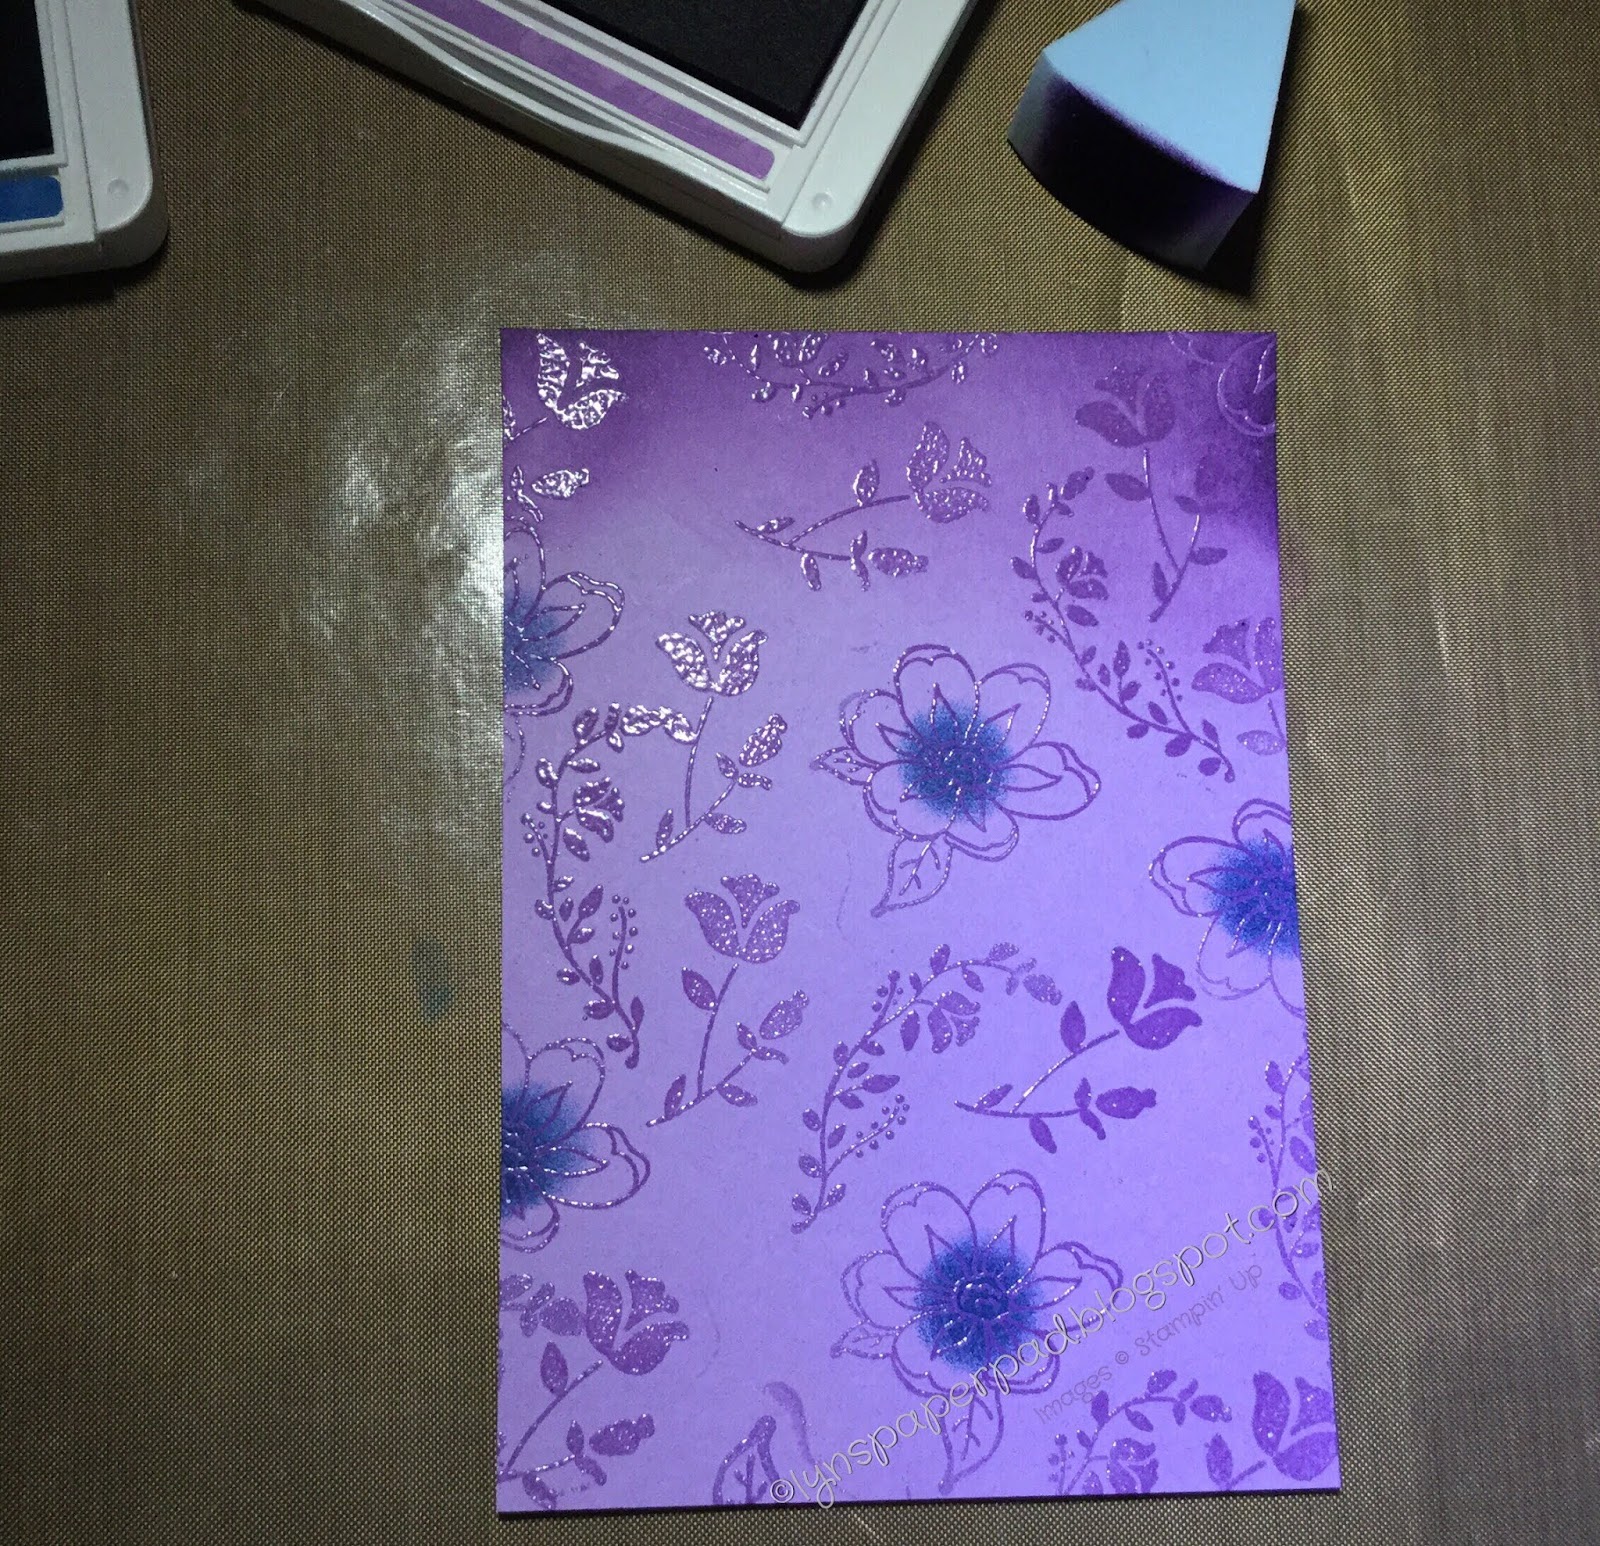
The next layer is Highland Heather cardstock and using the Botanical Bliss stamps, I have used the embossed resist technique. Stamping all Over with Versimark ink, before using heat embossing with clear embossing powder. 


I have added Pacific Point ink to the centre of each large flower, before 
blended the Gorgeous Grape over the entire image.  Once completely inked, I have gently rubbed a dry tissue over the cardstock layer, to reveal some of the Highland Heather colour where the clear embossing is.

Wanting a little more Highland Heather, I used a technique I CASED from GAIL ELLIS, Blue Rose Paper Treasures, where the top colour is lifted by Aqua Painter. Using aqua painter brush, which is damp, paint over the area you wish to expose, blot with dry tissue, repeat until you have desired colour effect.


Giving a two toned effect with the showing through, the card is completed in coordinating cardstock & Highland Heather ribbon.